In this guide, I’ve covered all 12 routes, 36 achievements, and their choices in Heartfall — A Tale in Three Lives. I’ve also included the important dialogue options, reputation requirements, and ending flags so you don’t have to replay entire sessions just to figure out what you missed.
Some routes have multiple endings, and a few require you to make specific choices several sessions earlier. I’ve separated each route so you can jump directly to the one you’re working on.
Spoiler Warning: The guide keeps general route descriptions as spoiler-free as possible, but the ending requirements contain major story spoilers, especially for the 3rd Life storyline.
Route 0: Have We Been Here Before?
How to unlock this route
Follow the canon events of 3rd Life:
- Bring Scar a Flint & Steel in Session 1.
- Blow him up.
- Pledge your loyalty to him after his death.
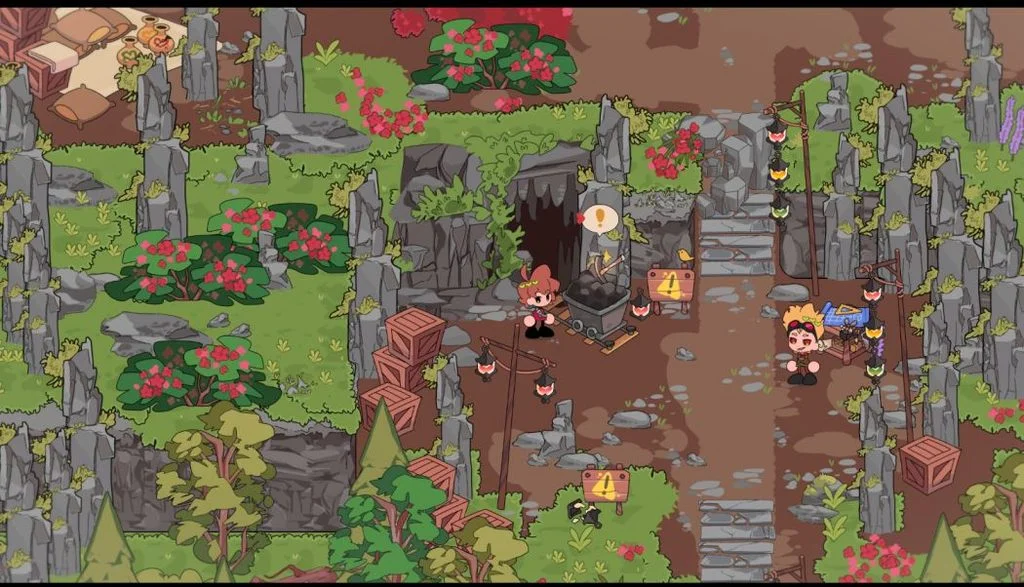
Now follow the main storyline without taking any alternative paths. In Session 2, Martyn will ask you to commit a crime with him. Decline his offer if you want to stay on this route.
Tip: I recommend keeping a save after leaving the village in Session 1, along with saves at the beginning of Sessions 2 and 3. You’ll be able to use these saves when exploring other routes instead of replaying everything.
All endings
1. So That’s How It Went
Follow the canon storyline. During your fight against Martyn at Dogwarts in Session 7, don’t select the (Take the blow.) choice.
2. That’s Not How It Went
First, collect at least 4 of the 10 ending flags listed below. Then, during the fight against Martyn at Dogwarts in Session 7, select (Take the blow.).
Ending flags
You need at least 4 of these choices to unlock That’s Not How It Went. A small jingle plays when you successfully collect a flag.
- Session 1: After blowing up Scar, choose “Scar… I’m just so sorry.
- Session 2: Choose (Stay quiet.) when you have the opportunity to tell BigB about Scar’s scams.
- Session 3: Choose (Stay silent.) instead of telling Cleo about Scar’s diamond chestplate.
- Session 3: When Scar asks whether you’re still friends after going red, choose “Yeah, of course.”
- Session 3: When Scar bullies Skizz out of his gear, choose “I’m sorry, Skizz. I have to do what he tells me.“
- Session 4: Talk to Cleo and Bdubs on the mountain and choose “Go easy on him.“
- Session 4: After blowing up Dogwarts, talk to Ren and choose “It was my fault.”
- Session 5: After getting caught trapping the Crastle, choose “He figured you wouldn’t accept a normal apology. This was his idea.“
- Session 5: At the end of the alliance conversation with Scott and Jimmy, choose “I’m glad Scar has some more friends now, other than just me.”
- Session 6: After Scar returns from burning Etho’s castle, choose “Knew you could charm them.“
Route 1: The Dark Forest
How to unlock this route
In Session 1, build your base in the forest instead of following the usual path.
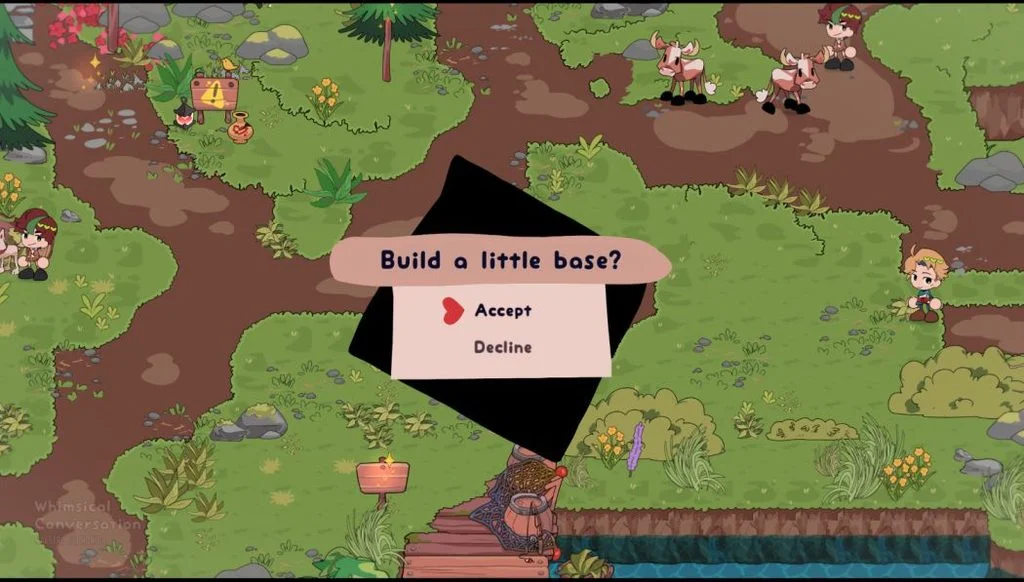
Bring Scar the Flint & Steel and blow him up. On your way to the desert, choose (Take a closer look, one last time.) and then decide to stay at your base.
All endings
1. Alone, Beloved
Finish the route with a good reputation with both Bdubs and Etho. You can check their reputation in the Info tab.
2. Die, Together
Finish the route with a neutral or poor reputation with at least one of them: Bdubs or Etho.
How to manage reputation
Getting good reputation with both characters is quite easy.
At the beginning of Session 4, talk to Bdubs and accept his request to speak with Impulse. Accepting the quest improves your reputation with Bdubs, while completing it improves your reputation with Etho.
For Die, Together, avoid building a good relationship with either character. These are the choices you need:
- Session 2: At the Crastle, interact with Bdubs but refuse to talk. Choose “Actually, I was just leaving.”
- Session 2: Find Etho outside the marsh. Choose “I know a thief when I see one!” and then “It can’t be anything good if you’re skulking about!” Refuse to give him a sapling.
- Session 3: Choose (Let it go.) to avoid improving your reputation with Bdubs.
- Session 3: Choose “Hey! The Crastle needs a favor.” to avoid improving your reputation with Etho.
- Session 4: Don’t accept Bdubs’ request to speak with Impulse. You can also avoid talking to him entirely.
- Session 4: When speaking with Cleo, choose “He’s on his way, actually!” to avoid improving your reputation with Etho.
The last choice may seem a little backwards, but it is required for this ending route.
Route 2: Dog-Eat-Dog World
How to unlock this route
Follow the canon events during the first day. In Session 2, find Martyn in the village and talk to him about your problems with Scar.
The easiest way to reach this route is to choose “Do you mean working *under* Scar?” followed by “It’s not how I thought things would be.”
All endings
1. Back Where It Started
During Session 7, side with Ren at the Crastle. Choose “Do you not have any words for those you killed?“
2. All For Naught
Side with Martyn at the Crastle in Session 7.
Choose “Our words can’t reach the dead anyway.” followed by “I would rather be remembered for the way I lived than the way I died.”
You can also get this ending by choosing “Aren’t you the ones who killed them?” without collecting enough ending flags.
3. I’ll Be Waiting
Collect at least 3 ending flags.
In Session 7, disagree with both characters at the Crastle:
- “Our words can’t reach the dead anyway.”
- “Aren’t you the ones who killed them?”
When you reach the forest, choose (Let it happen.)
4. Almost Home
Collect at least 3 ending flags and make the same two choices at the Crastle:
- “Our words can’t reach the dead anyway.”
- “Aren’t you the ones who killed them?”
In the forest, choose (Defend him.)
Important: Don’t pick up the Mystic Beef in Session 6. If you have it in your inventory when attempting this ending, you’ll eat it and get I’ll Be Waiting instead.
Ending flags
You need at least 3 of these choices to unlock I’ll Be Waiting or Almost Home. A jingle plays when you successfully collect a flag.
- Session 2: Talk to BigB and tell him not to trade with Scar. Choose “Don’t.”
- Session 4: Talk to Joel and agree with Martyn’s plan. Choose “Yeah, Joel, keep up. We’re stealing cows from Scott.”
- Session 4: After reading Scar’s second note, choose (Destroy it.) Avoiding the note entirely won’t give you this ending flag, even if you hear a jingle.
- Session 5: Talk to Impulse and choose “…”
- Session 5: When Bdubs and Cleo ask about the plan, choose “We’re going to kill Scar.”
- Session 5: When asked to decide Dogwarts, choose “The Red King should be Martyn.”
Route 3: Live, Laugh, Divorce
How to unlock this route
In Session 1, start building your base in the forest. When Jimmy and Scott approach you, agree to join their alliance.
All endings
1. Love Wins
In Session 7, don’t give the Golden Apple to either Jimmy or Scott. Choose (Take on Martyn.)
Also, don’t select “It was all thanks to the chickens.” if you see this option.
2. Love Loses
Give the Golden Apple to Scott in Session 7 by choosing (Let Scott go.)
3. Hate Wins
Have a neutral or poor reputation with Scott. Then give the Golden Apple to Jimmy by choosing (Let Jimmy go.)
4. Hate Loses
Have a good reputation with Scott. Then give the Golden Apple to Jimmy by choosing (Let Jimmy go.)
5. Happily Eggver After
Before finishing Session 7, play Chick Chance 17 times.
After that, don’t give the Golden Apple to either Jimmy or Scott. Choose (Take on Martyn.) and then select “It was all thanks to the chickens.”
How to manage reputation
Reputation changes quite frequently on this route, so the most recent important choice usually matters more than your earlier decisions.
If you want to lower your reputation with Scott for Hate Wins, keep the Enchanter secret by choosing (Keep quiet.)
For Hate Loses, reveal it using (Reveal the Enchanter.)
You can also improve your reputation with Scott by calling out Jimmy’s lava trap when he goes looking for armour in Session 7. Choose “Jimmy! *No!*”
How to play Chick Chance 17 times
Chick Chance is required for Happily Eggver After, but getting enough diamonds can be a little tricky.
First, collect the diamond on the beach before starting the route. If you already have diamonds when checking the river in Flower Valley, you’ll lose one.
You can collect up to 7 diamonds through these side quests (or 5 if you ask Scar for sand in Session 1):
- Session 1: After stealing the sand, talk to Martyn and agree to get him lapis.
- Session 2: Before leaving for the day, talk to Jimmy and agree to collect terracotta for him.
- Session 3: On your way to Joel, talk to Skizz and agree to spy on Impulse.
- Session 4: After Dare to Flare, talk to Tango and agree to buy a Sand Pass.
- Session 5: If you stole sand in Session 1, Scar gives you a diamond during the divorce court recess.
- Session 6: After asking Scar about Jimmy, talk to him again and agree to find a flower.
- Session 7: If you revealed the Enchanter, talk to Scott and agree to collect leather for him.
A note about Chick Chance: The game has a bug that can affect how it counts your plays, especially after loading saves with more than 10 previous plays. To avoid problems, try to collect all 7 diamonds by your tenth play.
Route 4: Ashes and Alliances
How to unlock this route
In Session 1, find Joel and agree to form an alliance with him.
All endings
1. A Lonely Death
In Session 6, choose “I want to leave.” to abandon your allies.
2. A New Family
Stay and fight by choosing “I want to stay.” without collecting any ending flags.
3. A Violent End
Collect at least 1 ending flag and then choose “I want to stay.” in Session 6.
Ending flags
All five flags are available in Session 5. You only need one for A Violent End, but collecting at least three unlocks an extra scene at the end of the session.
- After speaking with Scott and Jimmy, choose “If it comes down to it, I’ll take the hit.” followed by (Stare at him. You weren’t joking.)
- Before speaking with Scar, choose “It doesn’t matter what he says, I’ll figure something out.” Then choose “Maybe. Is it so bad if I do?” and finally “I was just saying I’d do anything to make sure we can make it out alive.”
- After speaking with Scar, choose “Don’t worry, Joel, I’ll do *anything* to protect you.” followed by “I would die for you.”
- Before speaking with Etho, choose “I would.”
- After speaking with Etho, choose “Is that what you’d do? For someone you care about?” followed by (Stay silent. You’d die for him without question.)
Route 5: You Should’ve Aimed for the Hand
How to unlock this route
Follow the canon events during the first day. In Session 2, when Martyn asks you to help him commit a crime, agree to his offer.
Ending
1. Can we go to the desert?
This route has only one ending. Simply complete the storyline to unlock it.
Route 6: The Cow Heist
How to unlock this route
Follow the canon storyline during the first day. In Session 2, agree to help Scott and Jimmy with their Cow Heist when they approach you.
All endings
1. Perennial Garden
In Session 5, agree to help the group investigate who burned down the valley. The quickest option is “Of course.”
2. Scorched Earth
In Session 5, refuse to help the group and insist that you need to check on Scar.
Choose “I can’t… I need to stay with Scar.” followed by “Don’t act like you know him.”
Note: The Scorched Earth choice happens in Session 5, not Session 6.
Route 7: Welcome Home, Ally
How to unlock this route
Agree to help Jimmy wrangle the cows, then continue bothering Scar as you would in the canon storyline.
At night, when you get the option to remember how much you’ve overextended yourself, choose (Remember.)
All endings
1. To Have Your Alliances, and Keep Them Too
Finish the route with a good reputation with Scar and at least one of the Bread Boys (Joel or Jimmy).
2. Together in the Desert
Finish with a good reputation with Scar but a neutral or poor reputation with both Joel and Jimmy.
3. It’s Us Until the End
Finish with a neutral or poor reputation with Scar and a good reputation with at least one of the Bread Boys.
4. What Else Did You Expect
Finish with a neutral or poor reputation with all three characters: Scar, Joel, and Jimmy.
For this ending, at least one alliance must have a poor reputation before the final battle. You’ll need room to improve one reputation stage when choosing where to go first.
Check the Info tab in the menu to keep track of everyone’s reputation.
How to manage reputation
Reputation is quite sensitive on this route. Some choices only change it by one stage, while others can directly set it to poor.
Getting a good reputation with Scar
These are the main choices you need:
- Session 2: When discussing your alliance, choose “What happens if I die right away?” followed by “Maybe we could be.”
- Session 3: Give Scar your Flint & Steel by choosing (Loose flint and steel.)
- Session 3: After going yellow, choose (Remain as his ally.)
- After going red: Visit Flower Valley to improve your reputation with both Bread Boys, or visit the desert to improve your reputation with Scar.
You can only choose one of these locations, so plan ahead.
Getting a good reputation with Joel and Jimmy
These choices help improve your reputation with the Bread Boys:
- Session 4: Talk to Jimmy and choose “I liked it when you were brave.” If you killed him, choose “I know it hurts to die.” instead.
- Session 4: Choose (Stop Joel.) to tell him you won’t support burning Scar’s base. This improves your reputation with Jimmy but lowers it with Joel. Alternatively, choose (Support Joel.) to do the opposite.
- Session 5: Before leaving Flower Valley, talk to Joel and choose “Cheating?” followed by “I would.”
- Session 5: Talk to Jimmy above the river on the right side of Flower Valley. Choose “I trust you.” followed by “You didn’t deserve it.”
- After going red: Visit Flower Valley to improve your reputation with both Bread Boys.
Getting poor reputation with the Bread Boys
This is relatively easy. In Session 5, choose (Abort the plan.)
This directly sets your reputation with both Joel and Jimmy to poor.
Getting poor reputation with Scar
Lowering Scar’s reputation takes a few more choices:
- Session 3: When Scar visits the bakery, choose (Take drastic measures.)
- Session 3: Gift Scar beach sand using (Loose beach sand.)
- Session 3: After going yellow, choose (Try to leave.)
Be careful with the first option, as it also affects Jimmy’s reputation. Keep an eye on his status if you’re aiming for It’s Us Until the End.
Route 8: Music is Magic
How to unlock this route
In Session 1, bring Impulse the materials he needs to build a music box. After that, agree to show him the library.
All endings
1. Solitude
In Session 2, refuse to collect food for the wolf.
2. Self-Inflicted Solitude
Don’t collect all three ending flags. Then, in Session 5, after killing Bdubs, choose not to use the Music Box.
3. Dal Segno al Coda
Don’t collect all three ending flags. In Session 5, use the Music Box after killing Bdubs.
4. Dal Segno al Fine
Collect all three ending flags and finish the route.
5. Fallen Companions
Die in Session 5. You can do this by either refusing to run from Martyn in the desert or not killing Bdubs at the Crastle.
Ending flags
You need all three flags for Dal Segno al Fine. If you miss even one, you can still get Self-Inflicted Solitude or Dal Segno al Coda.
- Session 3: Agree to bring Etho some Red Jasper.
- Session 3: When asked to get your team dancing, choose “You sure? C’mon, […], it’ll be fun!”
- Session 4: Agree to collect flowers for Jimmy.
Route 9: The Court of Last Chances
How to unlock this route
Follow the canon storyline for the first two days.
In Session 3, head to the bottom corner of Flower Valley and follow the goose. When you get the option, choose to sabotage the Mystic Grove.
All endings
1. A Home Where You Are
Finish the route with fewer than 8 bad ending flags.
You can check your progress in the Info tab. At the beginning of Session 8, your reputation with Scar should be good.
2. Minutes Past Midnight
Collect at least 8 ending flags and finish with a neutral or poor reputation with at least one member of the court.
3. Dusk to Dawn
Collect at least 8 ending flags and finish with a good reputation with all four members of the court.
Ending flags
You need at least 8 of these choices for Minutes Past Midnight or Dusk to Dawn.
The Info tab can help you track your progress. Your reputation with Scar will be poor if you’ve collected:
- 7 or more flags at the beginning of Session 6.
- 8 or more flags at the beginning of Sessions 7 and 8.
Here are all the choices that count:
- Session 4: When Scar kills the creeper in the bush, choose “Scar! Why did you do that?!”
- Session 5: Disagree with Scar about sneaking out. Choose “Don’t you realize the risk of trying to escape?”
- Session 5: When caught escaping the court, don’t help Scar talk your way out. Choose “…”
- Session 5: When Scar suggests using the curse in Flower Valley, choose “No way. We don’t need to use this curse to do anything.”
- Session 5: Side with Etho about the free sand. Choose “Scar, Etho’s right. You did do that.”
- Session 5: Refuse to promise Scar anything at the Crastle. Choose “… Do you *really* think we could promise something like that?”
- Session 5: Tell Scar not to play Dare to Flare. Choose “No way! Everyone we talk to tells us how easy it is to die doing this!”
- Session 5: When Scar talks to Cleo and Bdubs at Dogwarts, choose (You don’t like the look of this.)
- Session 5: At the volcano, don’t look through the chest. Choose (Resist! This is a communal chest—only take what you need.)
- Session 5: Complain about Scar to Impulse and Bdubs. Choose “Trust me, I understand.”
- Session 6: Let Scar handle the cover story himself. Choose (Ignore Martyn.)
- Session 6: After going yellow, don’t reassure Scar that you’ll stay with him. Choose “…”
- Session 7: Refuse to apologise for cutting down the Mystic Saplings. Choose “We were trying to survive. How was I supposed to know?”
- Session 7: Complain about the photo. Choose “You’ve got to be kidding me.”
- Session 8: When Scar talks to Dogwarts, choose (Stay quiet.)
Important: Two choices can make Dusk to Dawn harder to achieve:
- Skipping the volcano chest removes an opportunity to improve your reputation with the Queen (Lizzie).
- Refusing to apologise for cutting down the Mystic Saplings removes an opportunity to improve your reputation with the guard (Gem).
Keep these in mind if you’re going for the perfect reputation ending.
How to improve reputation with the court
For Dusk to Dawn, you mainly need to worry about Lizzie (the Queen) and Gem (the guard).
Your reputation with Mumbo (the jester) and Pearl (the wolf) is automatically set to good at the beginning of Session 7.
You start with poor reputation with both Lizzie and Gem. To get them to good, choose at least two reputation-improving options for each character.
Improving reputation with Lizzie (the Queen):
- Session 5: Talk to Joel and agree to ally with him. Choose “Sounds fair to me.” This improves your reputation with Lizzie in Session 8.
- Session 5: Look through the volcano chest and choose (You can’t carry it all, but you *can* carry the biggest, shiniest, fanciest one!)
Giving Joel Jimmy’s stolen diamonds doesn’t affect your reputation.
Improving reputation with Gem (the guard):
- Session 6: After returning, choose “You should’ve been there too!”
- Session 7: While looking for the goose, choose “Woah! Dude, that’s awesome!”
- Session 7: During the goose search, choose “… You’re right, it was stupid to do. I’m sorry.”
Improving reputation with Lizzie again:
- Session 7: After returning the Queen’s treasure, choose “It would’ve been awful to lose something so important.”
Extra scenes with Mumbo and Pearl
These aren’t required for the endings, but you can unlock additional scenes by keeping a good relationship with them.
- Mumbo: Have neutral or better reputation after helping with the geese in Session 4.
- Pearl: Have good reputation before setting the village TNT trap in Session 6.
Use these choices:
- Session 3: Choose “Pfft.” to improve reputation with Mumbo. Choose “I hope your swing is better than your jokes.” if you want to lower it.
- Session 4: While picking berries, choose “Thank you for stopping him.” to improve reputation with Pearl.
- Session 4: After dealing with the creeper, choose “It was a *honking* good time.” to improve reputation with Mumbo.
- Session 6: After you and Scar die, choose “Aww, you’ll help *me* though, right?” to improve reputation with Pearl.
Route 10: Any-fin is possible!
How to unlock this route
After introducing yourself in the village during Session 1, pick up the fishing rod near the dock. Keep fishing at the dock until you catch the Catalog Book.
Read the book and accept its quest to unlock the route.
All endings
1. Bass Friends Forever: True Pacifish
Catch and deliver all 12 gifts to their correct recipients.
Most recipients are easy to figure out if you know the characters. If you get stuck, talk to Scar for a hint.
2. Fish or Be Fished: Fishmaster
Catch and deliver at least one gift, but don’t deliver all 12.
If you’ve already unlocked True Pacifish, reload your Session 4 save and simply avoid delivering the gifts for this ending.
3. Goodbye Krill World: Fishing Anonymous
Catch all 12 gifts but keep every single one for yourself.
Yes, you actually have to fish up all the gifts and then refuse to give any of them away.
Bonus Secret – Fisherman’s Outfit
During this route, keep fishing even after you’ve collected all the available items. Eventually, you’ll obtain a Fisherman’s Outfit that you can wear. This is confirmed from Session 4, after getting the guitar, though it may not be available in every session. It doesn’t unlock an achievement, but it’s a fun optional reward that’s easy to miss.
Route 11: Wolf in Sheep’s Wool
How to unlock this route
Start a new save file for this route.
In the starting grove, keep staring at the statue until it blinks. You must do this before leaving the beach for the first time, as you won’t be able to interact with the statue afterward.
All endings
1. Never Alone Again
In Session 7, when you reach the volcano, choose (Refuse to abandon your friends)
2. A Promise Fulfilled
In Session 7, choose (Do something reckless) at the volcano.
A little advice before you start: Keep separate saves at the beginning of important sessions, especially Sessions 1, 2, 3, and 5. Some endings depend on choices that you made earlier, and having these saves will save you a lot of replaying.
Also, don’t think that every dialogue jingle means you’ve collected an ending flag. Some choices only affect character reputation or unlock quests. Check the Info tab whenever you need to keep track of your progress.